


On this article, you’ll learn to construct, deploy, and take a look at a no-code document-processing AI agent with LlamaAgents Builder in LlamaCloud.
Subjects we are going to cowl embody:
- Learn how to create a document-classification agent utilizing a pure language immediate.
- Learn how to deploy the agent to a GitHub-backed software with out writing code.
- Learn how to take a look at the deployed agent on invoices and contracts within the LlamaCloud interface.
Let’s not waste any extra time.
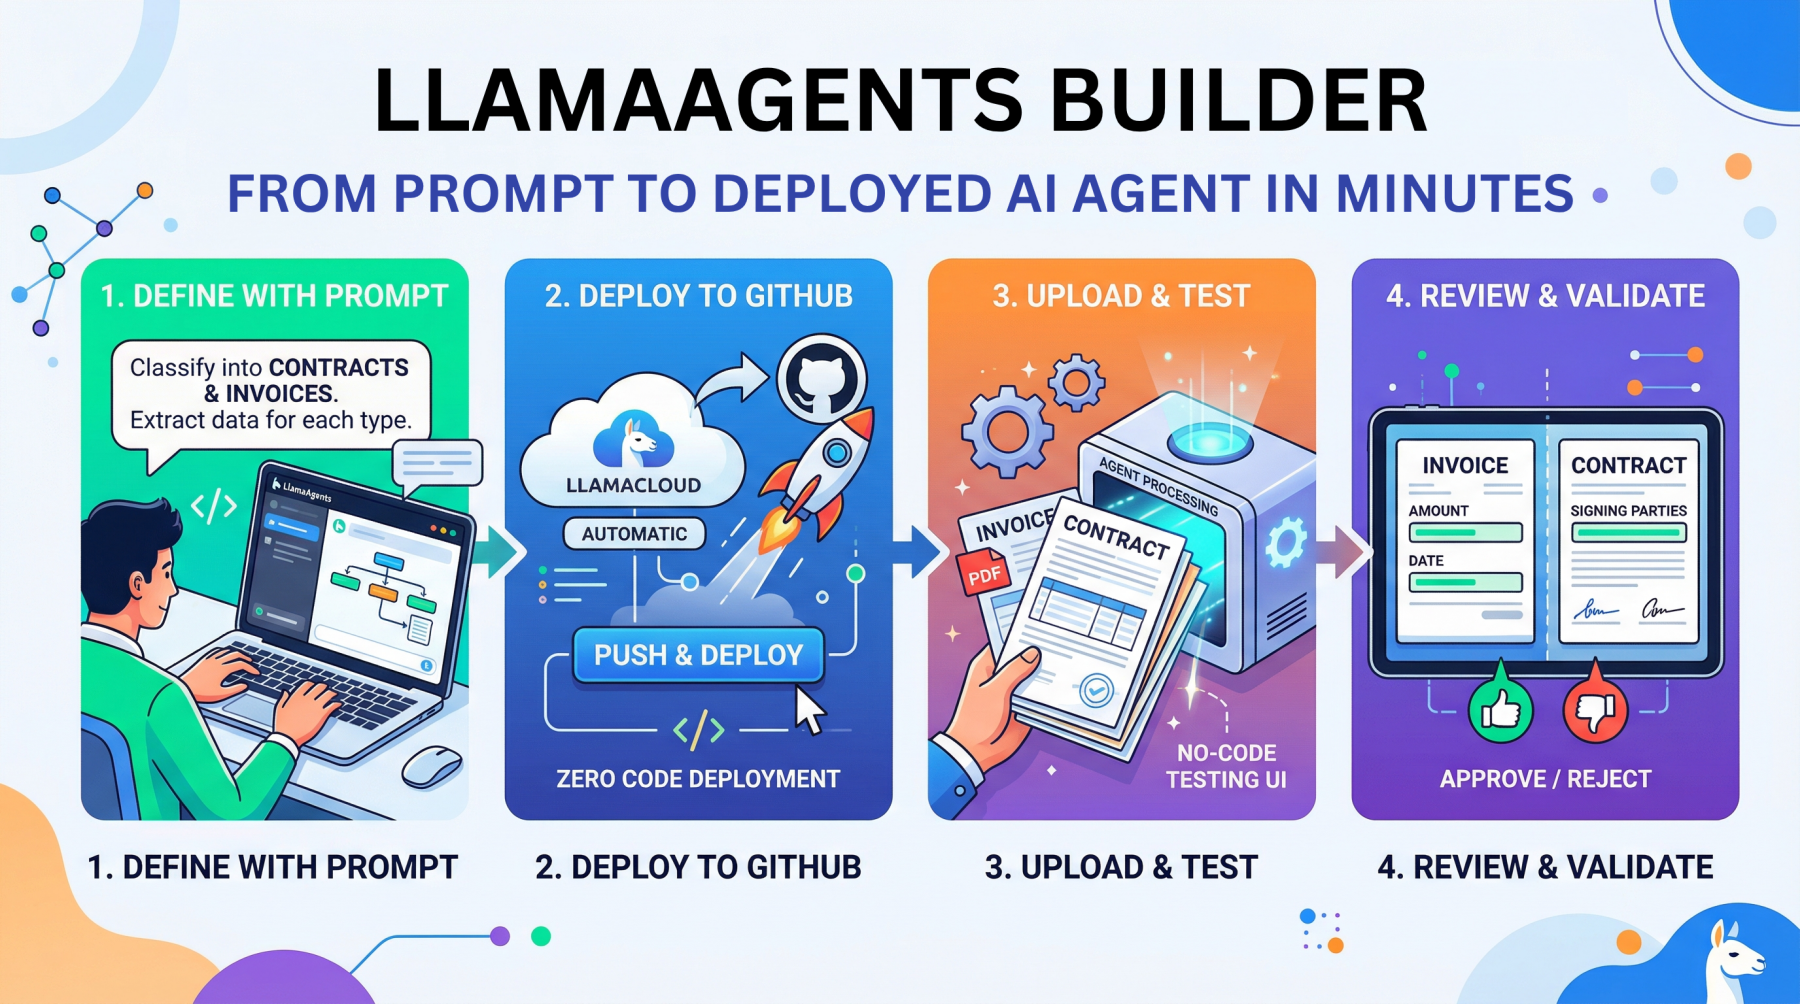
LlamaAgents Builder: From Immediate to Deployed AI Agent in Minutes (click on to enlarge)
Picture by Editor
Introduction
Creating an AI agent for duties like analyzing and processing paperwork autonomously used to require hours of near-endless configuration, code orchestration, and deployment battles. Till now.
This text unveils the method of constructing, deploying, and utilizing an clever agent from scratch with out writing a single line of code, utilizing LlamaAgents Builder. Higher nonetheless, we are going to host it as an app in a software program repository that can be 100% owned by us.
We are going to full the entire course of in a matter of minutes, so time is of the essence: let’s get began.
Constructing with LlamaAgents Builder
LlamaAgents Builder is among the latest options within the LlamaCloud net platform, whose flagship product was initially launched as LlamaParse. A barely complicated mixture of names, I do know! For now, simply remember that we are going to entry the brokers builder by way of this hyperlink.
The very first thing you must see is a house menu just like the one proven within the screenshot beneath. If this isn’t what you see, strive clicking the “LlamaParse” icon within the top-left nook as a substitute, after which you must see this — at the very least on the time of writing.
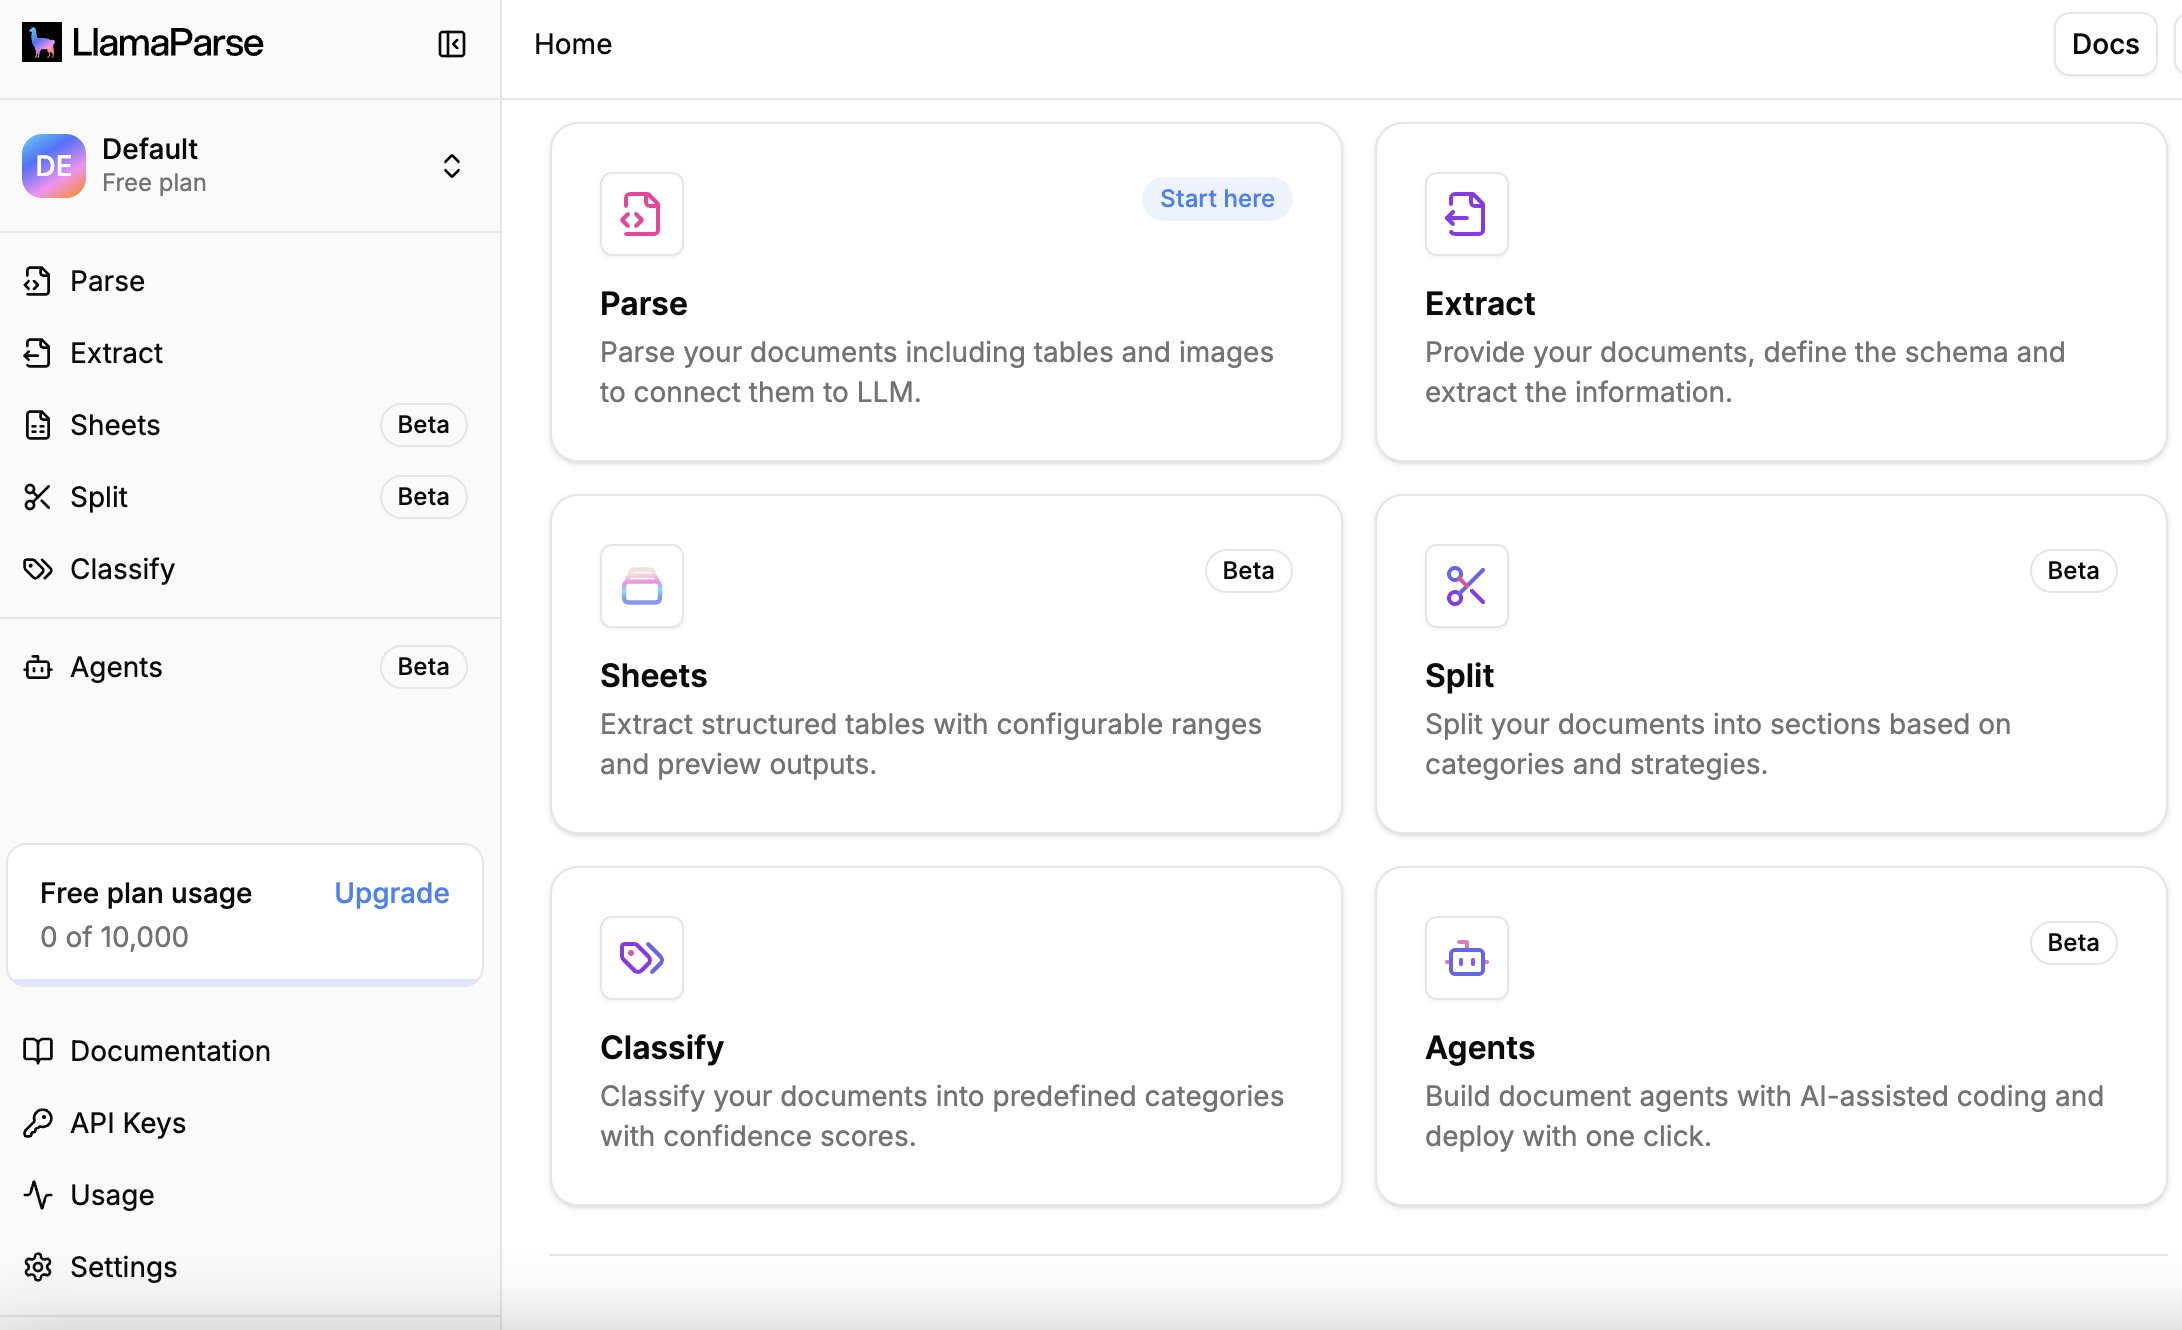
LlamaParse dwelling menu
Discover that, on this instance, we’re working below a newly created free-plan account, which permits as much as 10,000 pages of processing.
See the “Brokers” block on the bottom-right facet? That’s the place LlamaAgents Builder lives. Despite the fact that it’s in beta on the time of writing, we are able to already construct helpful agent-based workflows, as we are going to see.
As soon as we click on on it, a brand new display screen will open with a chat interface just like Gemini, ChatGPT, and others. You’ll get a number of prompt workflows for what you’d like your agent to do, however we are going to specify our personal by typing the next immediate into the enter field on the backside. Simply pure language, no code in any respect:
Create an agent that classifies paperwork into “Contracts” and “Invoices”. For contracts, extract the signing events; for invoices, the full quantity and date.
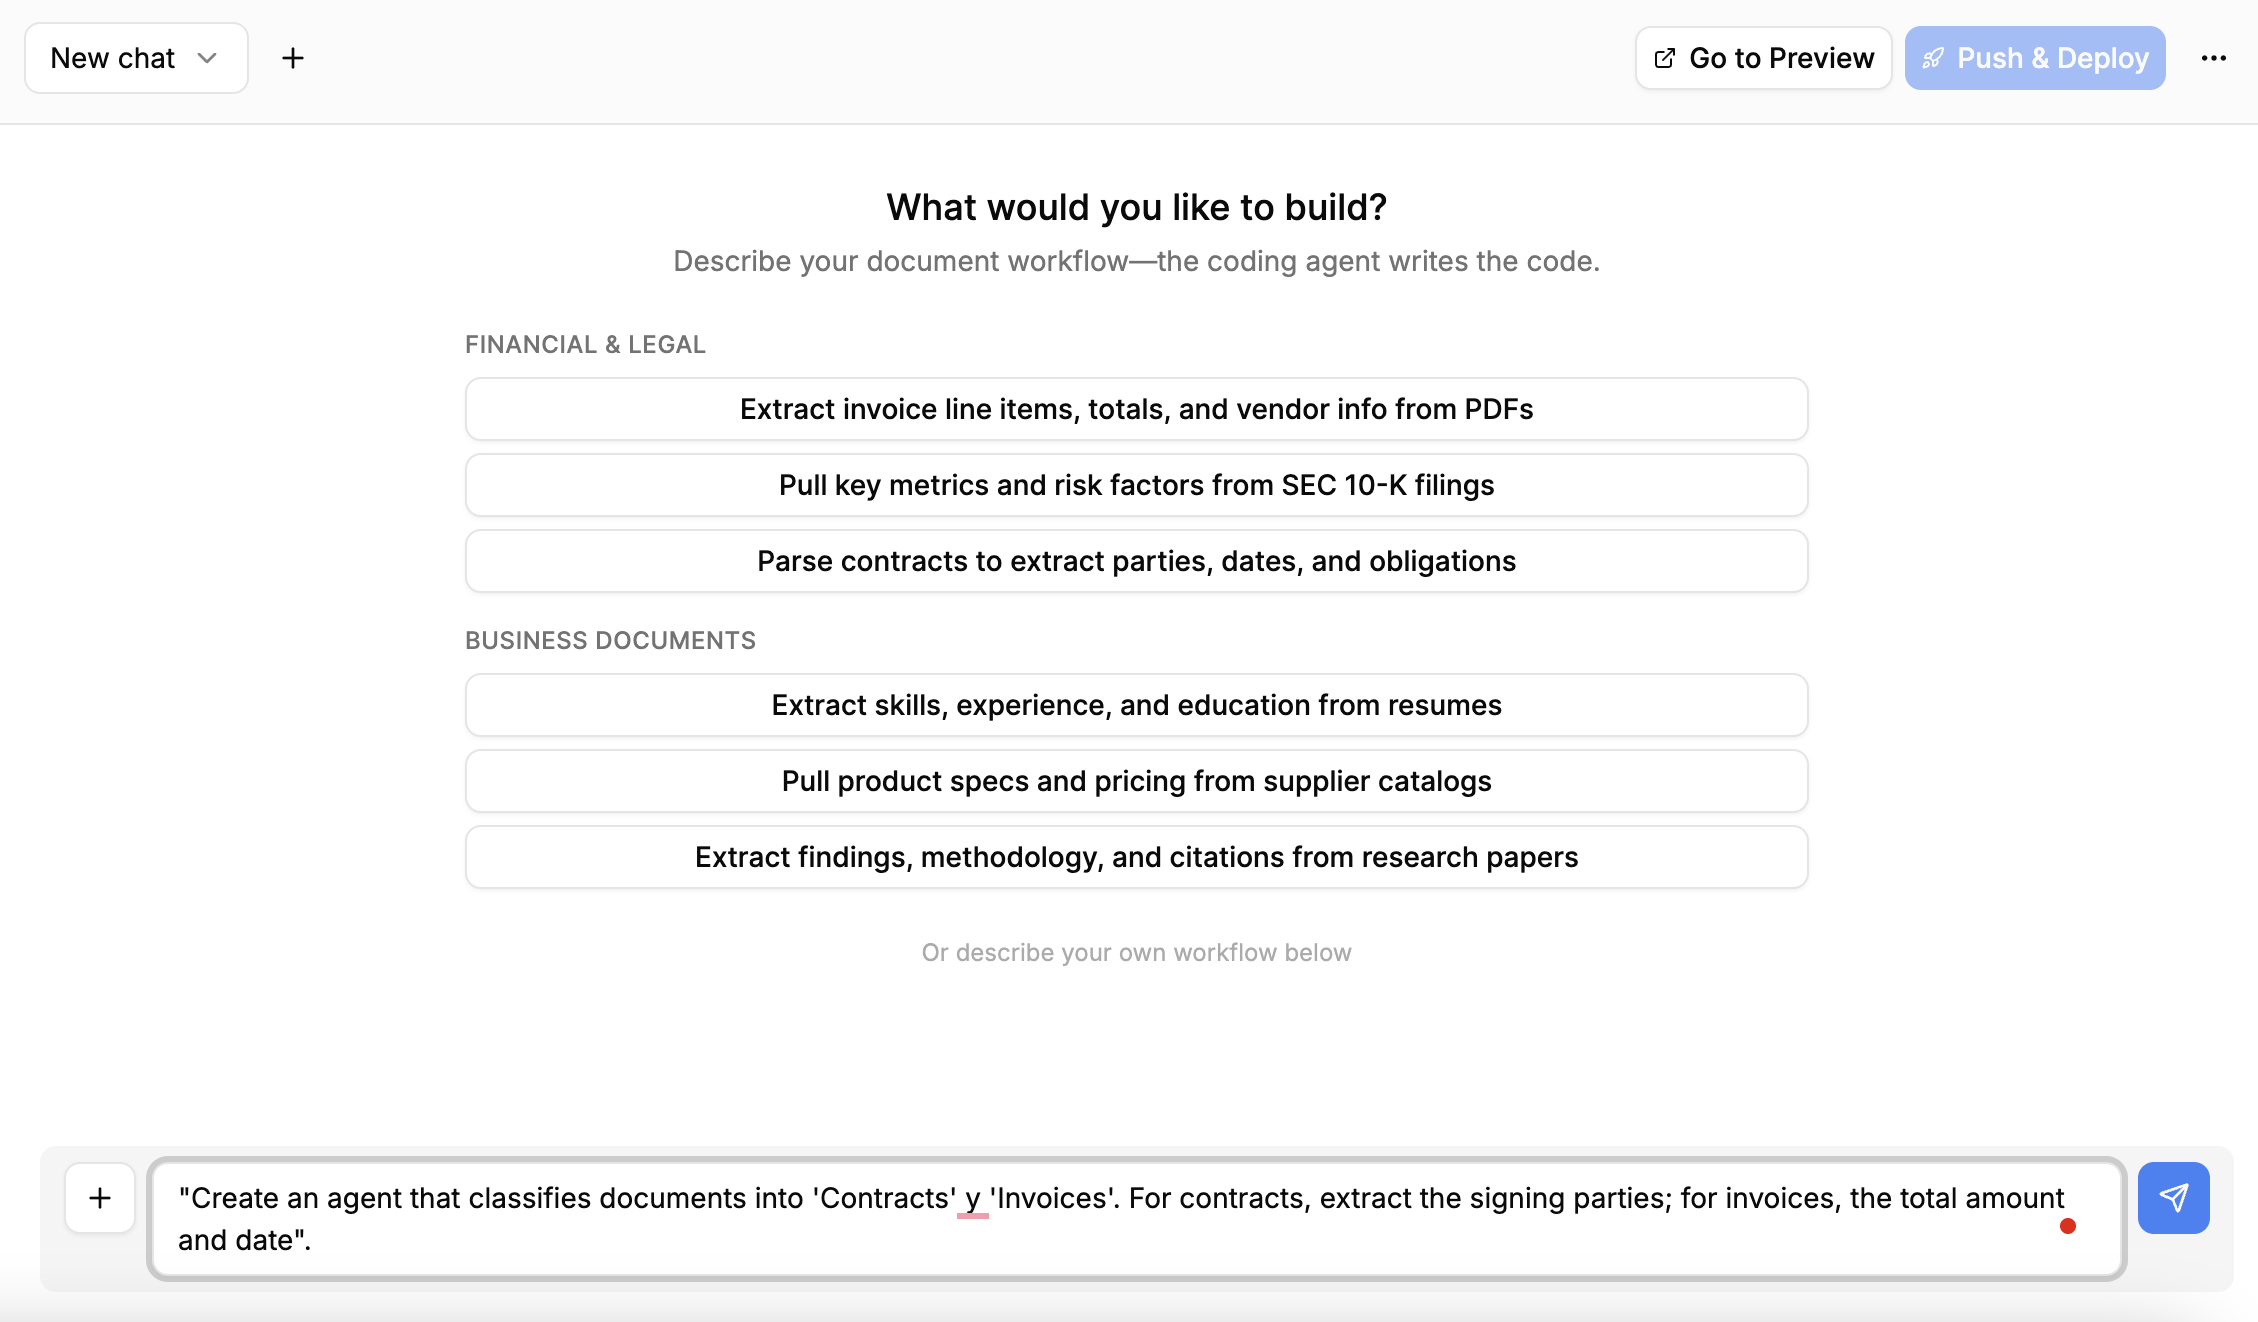
Specifying what the agent ought to do with a pure language immediate
Merely ship the immediate, and the magic will begin. With a exceptional degree of transparency within the reasoning course of, you’ll see the steps accomplished and the progress made up to now:
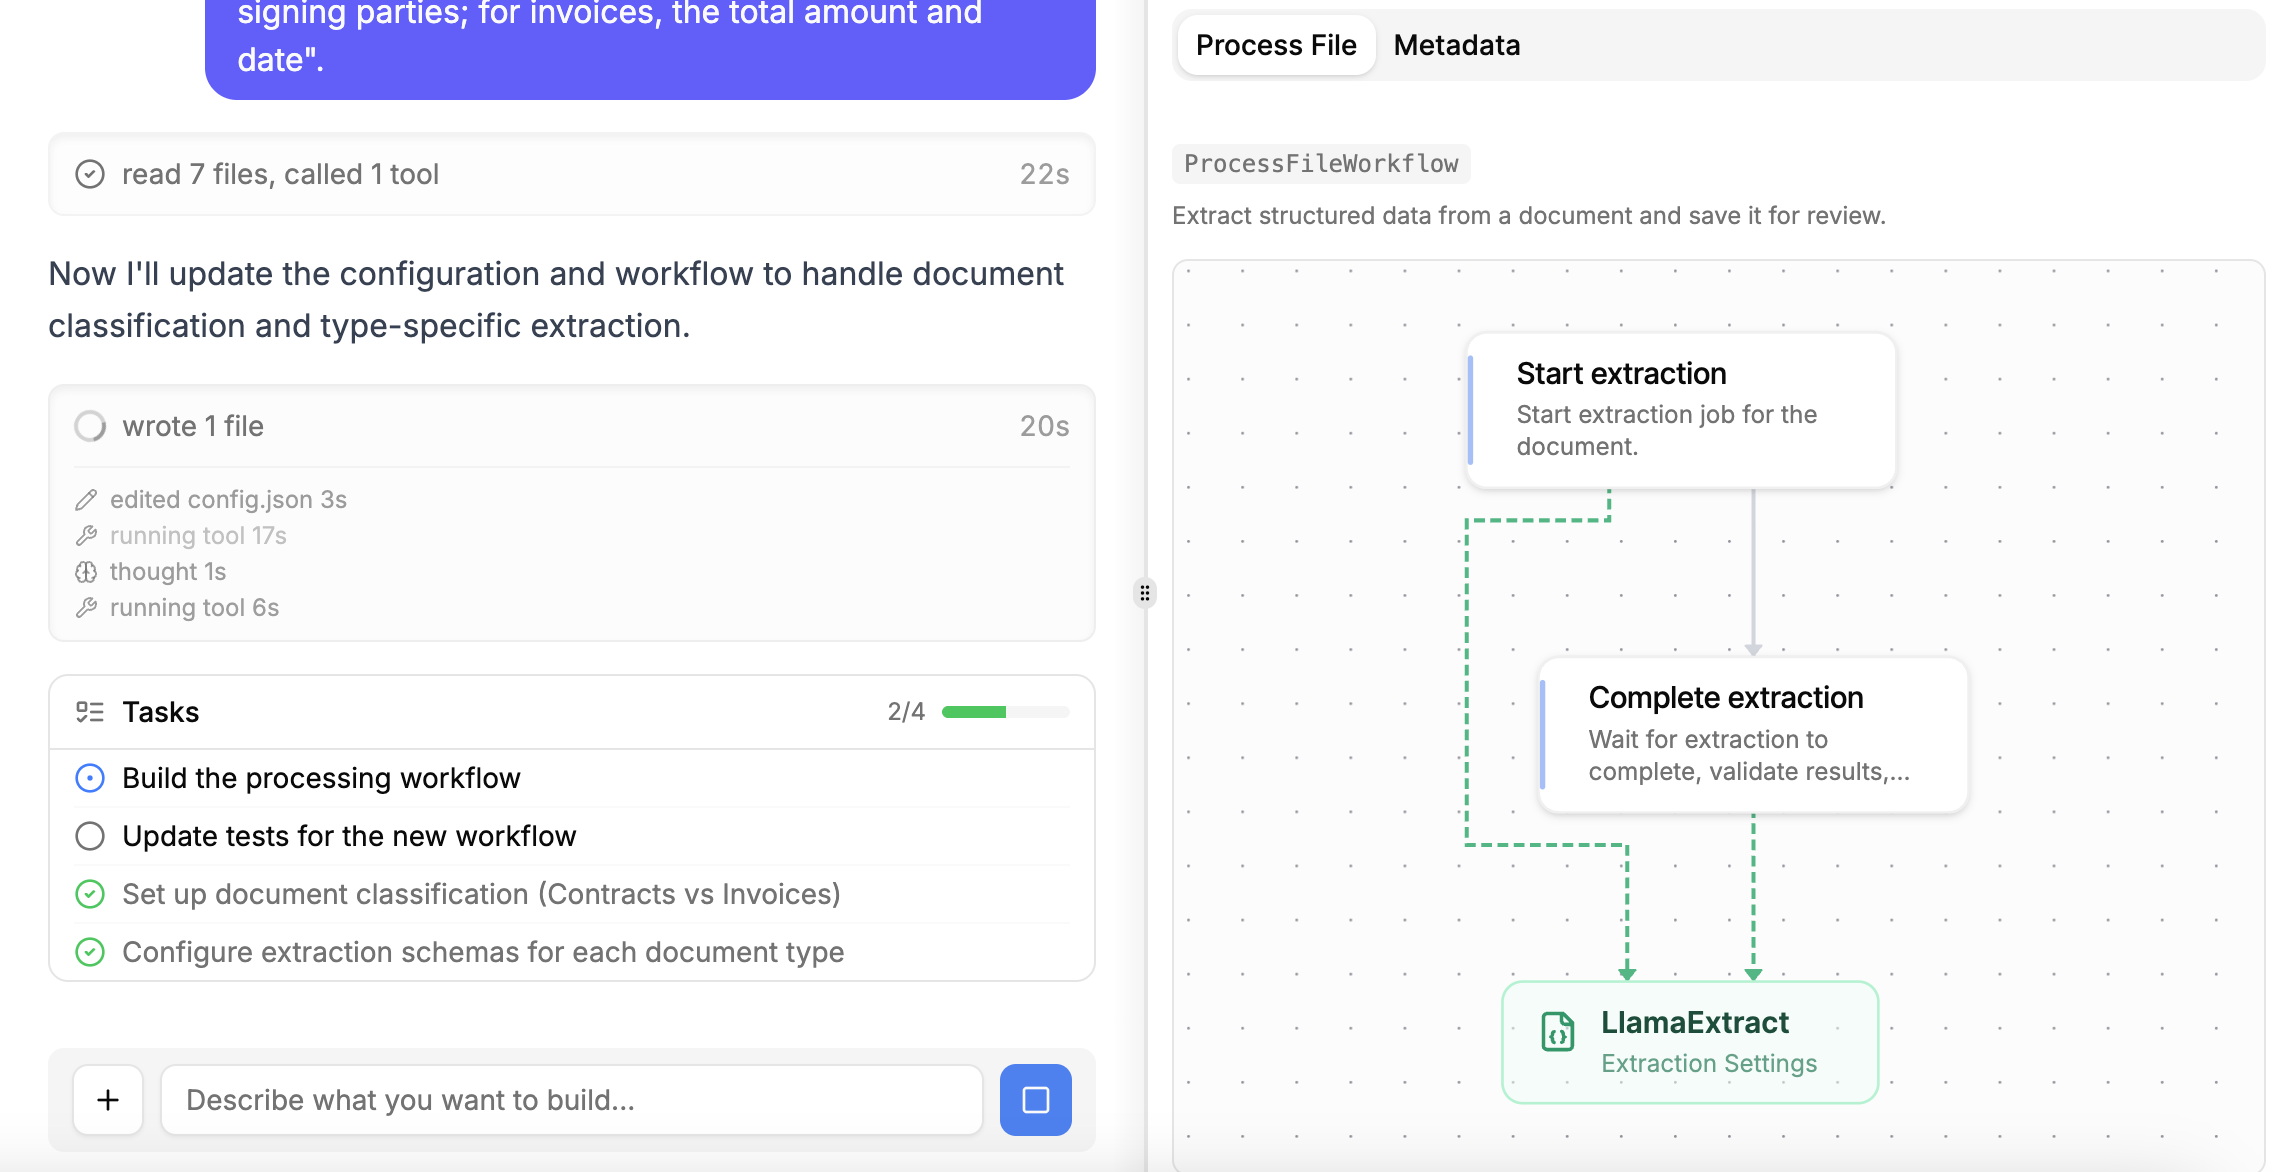
AgentBuilder creating our agent workflow
After a couple of minutes, the creation course of can be full. Not solely are you able to see the complete workflow diagram, which has step by step grown all through the method, however you additionally obtain a succinct and clear description of tips on how to use your newly created agent. Merely wonderful.
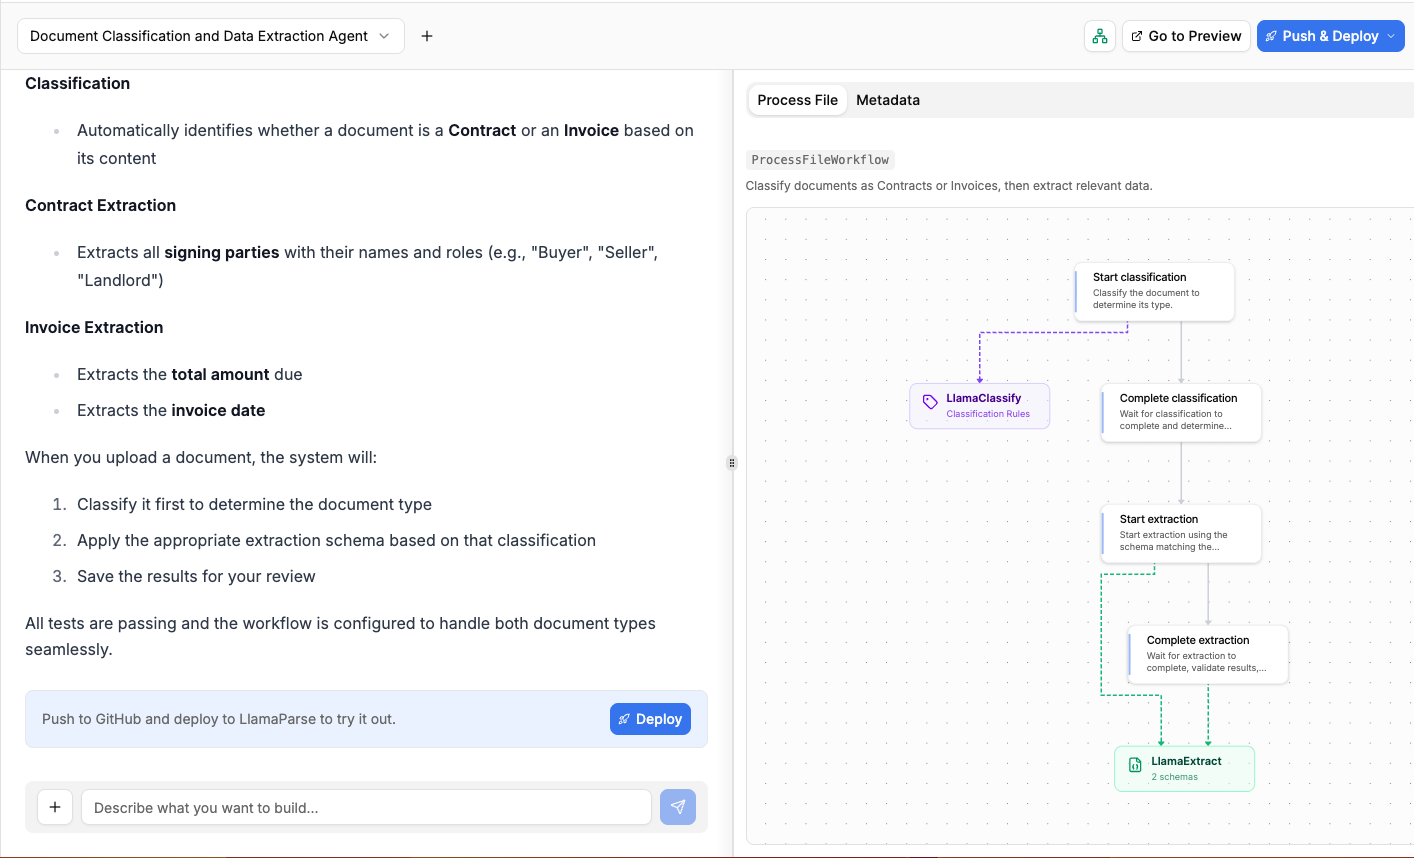
Agent workflow constructed
The subsequent step is to deploy our agent in order that it may be used. Within the top-right nook, you might even see a “Push & Deploy” button. This initiates the method of publishing your agent workflow’s software program packages right into a GitHub repository, so be sure to have a registered account on GitHub first. You may simply register with an present Google or Microsoft account, as an example. After getting the LlamaCloud platform related to your GitHub account, this can be very simple to push and deploy your agent: simply give it a reputation, specify whether or not you need it in a non-public repository, and that’s it:
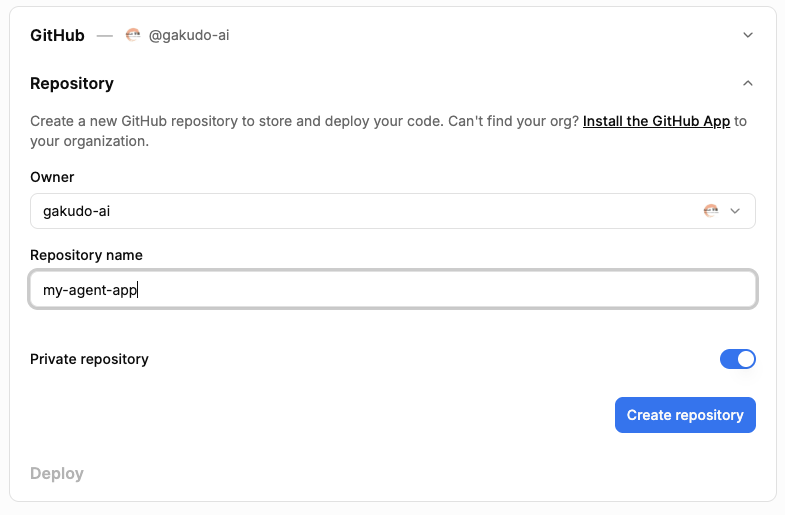
Pushing and deploying agent workflow into GitHub
The method will take a couple of minutes, and you will note a stream of command-line-like messages showing on the fly. As soon as it’s finalized and your agent standing seems as “Operating“, you will note a couple of remaining messages just like this:
|
[app] 10:01:08.583 information Software startup full. (uvicorn.error) [app] 10:01:08.589 information Uvicorn operating on http://0.0.0.0:8080 (Press CTRL+C to give up) (uvicorn.error) [app] 10:01:09.007 information HTTP Request: POST https://api.cloud.llamaindex.ai/api/v1/beta/agent-data/:search?project_id= |
The “Uvicorn” messages point out that our agent has been deployed and is operating as a microservice API inside the LlamaCloud infrastructure. If you’re conversant in FastAPI endpoints, you might need to strive it programmatically by way of the API, however on this tutorial, we are going to hold issues easier (we promised zero coding, didn’t we?) and check out every part ourselves in LlamaCloud’s personal consumer interface.
To do that, click on the “Go to” button that seems on the high:

Deployed agent up and operating
Now comes essentially the most thrilling half. It’s best to have been taken to a playground web page known as “Evaluation,” the place you possibly can strive your agent out. Begin by importing a file, for instance, a PDF doc containing an bill or a contract. For those who don’t have one, simply create a fictitious instance doc of your individual utilizing Microsoft Phrase, Google Docs, or the same instrument, akin to this one:
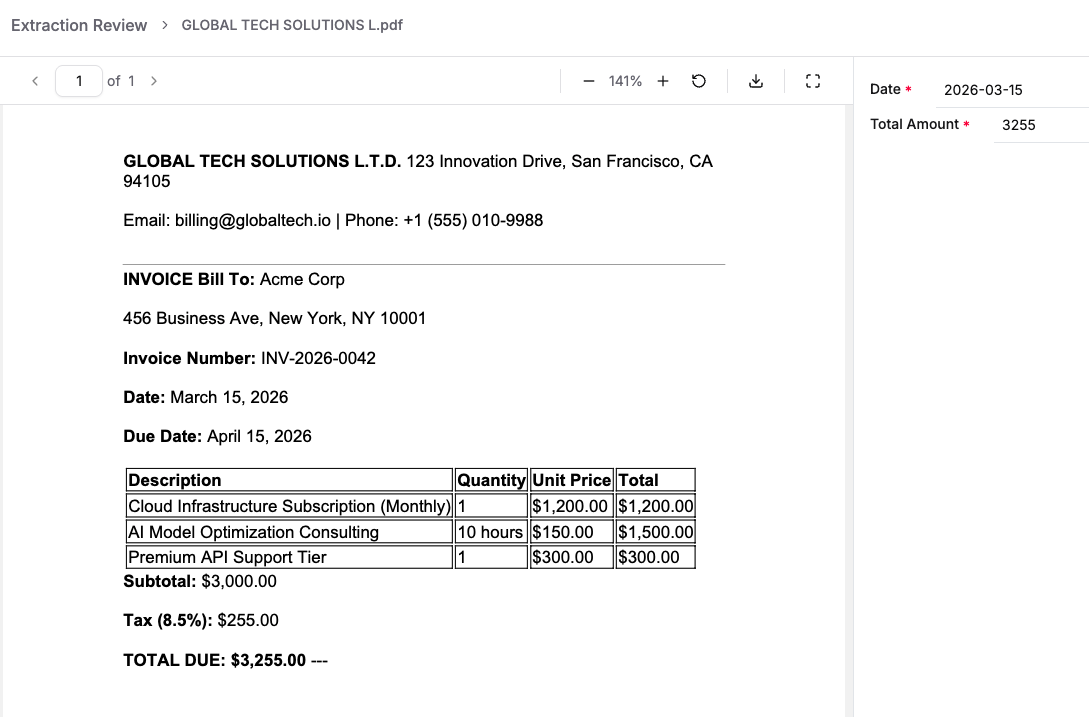
LlamaCloud Agent Testing UI: processing an bill
As quickly because the doc is loaded, the agent begins working by itself, and in a matter of seconds, it would classify your doc and extract the required information fields, relying on the doc sort. You may see this outcome on the right-hand-side panel within the picture above: the full quantity and bill date have been appropriately extracted by the agent.
How about importing an instance doc containing a contract now?
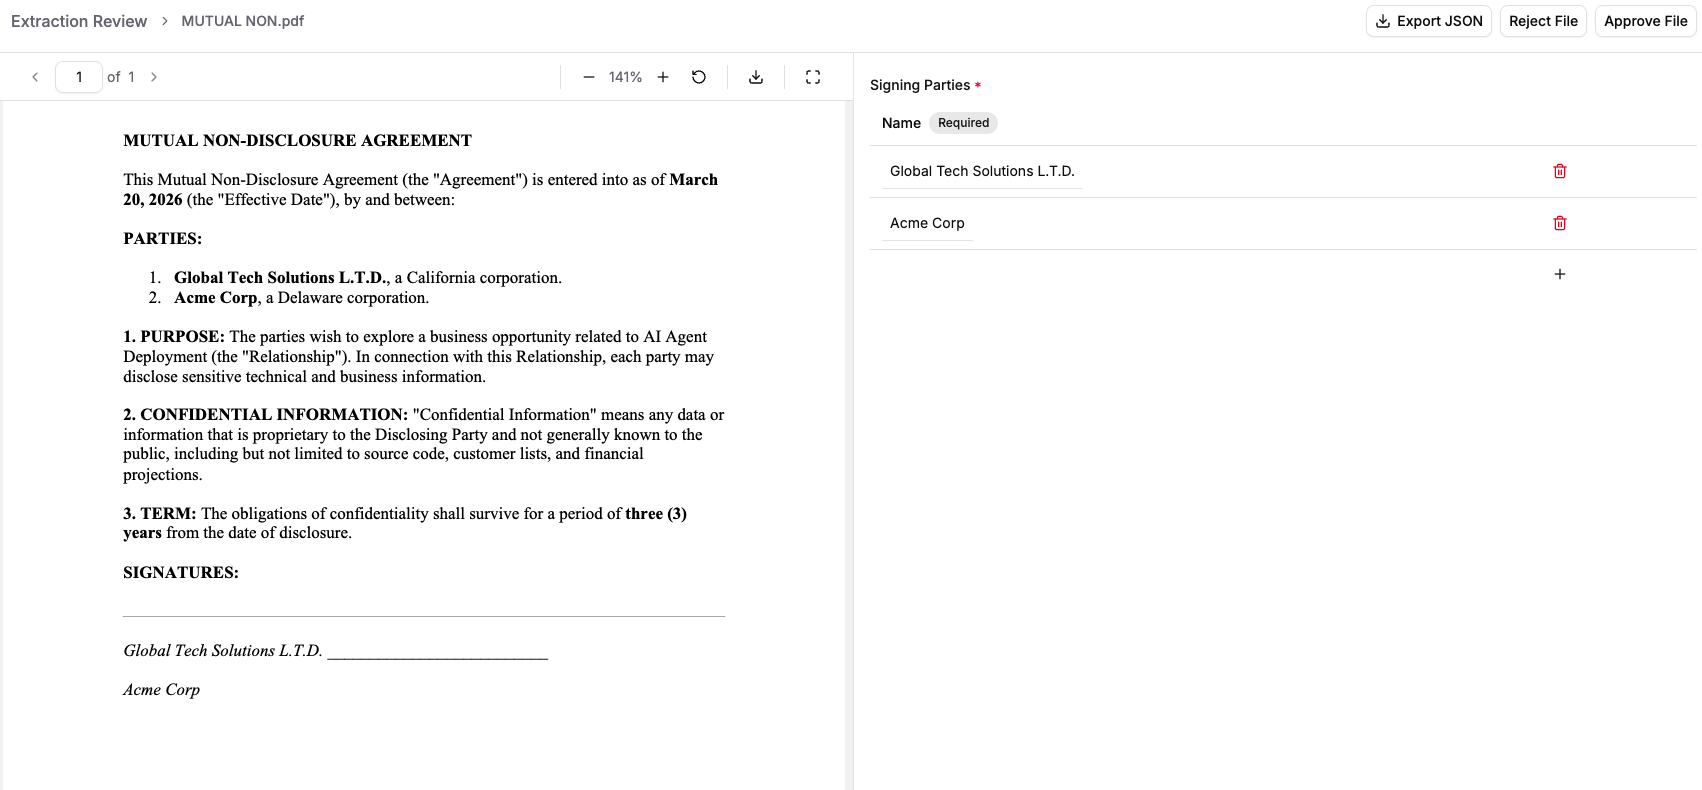
LlamaCloud Agent Testing UI: processing a contract
As anticipated, the doc is now labeled as a contract, and on this event, the extracted data consists of the names of the signing events.
Properly completed! As you retain operating examples, be sure to approve or reject them based mostly on whether or not they have been processed appropriately: this helps the agent be taught from suggestions.
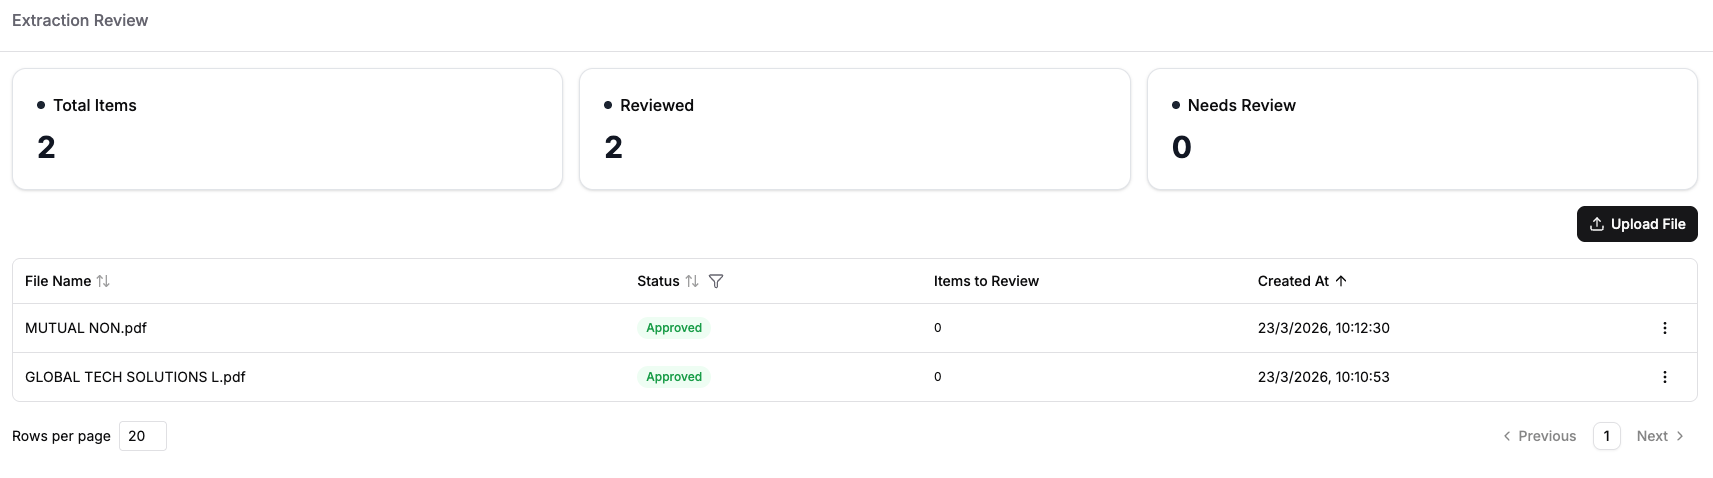
Agent testing circumstances and their standing
Wrapping Up
We’ve got seen tips on how to construct and deploy, step-by-step and with no strains of code, an AI agent able to classifying paperwork and processing them in several methods relying on the doc sort — all in a matter of minutes and inside LlamaCloud’s newly added characteristic, LlamaAgents Builder.
On this article, you’ll learn to construct, deploy, and take a look at a no-code document-processing AI agent with LlamaAgents Builder in LlamaCloud.
Subjects we are going to cowl embody:
- Learn how to create a document-classification agent utilizing a pure language immediate.
- Learn how to deploy the agent to a GitHub-backed software with out writing code.
- Learn how to take a look at the deployed agent on invoices and contracts within the LlamaCloud interface.
Let’s not waste any extra time.
LlamaAgents Builder: From Immediate to Deployed AI Agent in Minutes (click on to enlarge)
Picture by Editor
Introduction
Creating an AI agent for duties like analyzing and processing paperwork autonomously used to require hours of near-endless configuration, code orchestration, and deployment battles. Till now.
This text unveils the method of constructing, deploying, and utilizing an clever agent from scratch with out writing a single line of code, utilizing LlamaAgents Builder. Higher nonetheless, we are going to host it as an app in a software program repository that can be 100% owned by us.
We are going to full the entire course of in a matter of minutes, so time is of the essence: let’s get began.
Constructing with LlamaAgents Builder
LlamaAgents Builder is among the latest options within the LlamaCloud net platform, whose flagship product was initially launched as LlamaParse. A barely complicated mixture of names, I do know! For now, simply remember that we are going to entry the brokers builder by way of this hyperlink.
The very first thing you must see is a house menu just like the one proven within the screenshot beneath. If this isn’t what you see, strive clicking the “LlamaParse” icon within the top-left nook as a substitute, after which you must see this — at the very least on the time of writing.
LlamaParse dwelling menu
Discover that, on this instance, we’re working below a newly created free-plan account, which permits as much as 10,000 pages of processing.
See the “Brokers” block on the bottom-right facet? That’s the place LlamaAgents Builder lives. Despite the fact that it’s in beta on the time of writing, we are able to already construct helpful agent-based workflows, as we are going to see.
As soon as we click on on it, a brand new display screen will open with a chat interface just like Gemini, ChatGPT, and others. You’ll get a number of prompt workflows for what you’d like your agent to do, however we are going to specify our personal by typing the next immediate into the enter field on the backside. Simply pure language, no code in any respect:
Create an agent that classifies paperwork into “Contracts” and “Invoices”. For contracts, extract the signing events; for invoices, the full quantity and date.
Specifying what the agent ought to do with a pure language immediate
Merely ship the immediate, and the magic will begin. With a exceptional degree of transparency within the reasoning course of, you’ll see the steps accomplished and the progress made up to now:
AgentBuilder creating our agent workflow
After a couple of minutes, the creation course of can be full. Not solely are you able to see the complete workflow diagram, which has step by step grown all through the method, however you additionally obtain a succinct and clear description of tips on how to use your newly created agent. Merely wonderful.
Agent workflow constructed
The subsequent step is to deploy our agent in order that it may be used. Within the top-right nook, you might even see a “Push & Deploy” button. This initiates the method of publishing your agent workflow’s software program packages right into a GitHub repository, so be sure to have a registered account on GitHub first. You may simply register with an present Google or Microsoft account, as an example. After getting the LlamaCloud platform related to your GitHub account, this can be very simple to push and deploy your agent: simply give it a reputation, specify whether or not you need it in a non-public repository, and that’s it:
Pushing and deploying agent workflow into GitHub
The method will take a couple of minutes, and you will note a stream of command-line-like messages showing on the fly. As soon as it’s finalized and your agent standing seems as “Operating“, you will note a couple of remaining messages just like this:
|
[app] 10:01:08.583 information Software startup full. (uvicorn.error) [app] 10:01:08.589 information Uvicorn operating on http://0.0.0.0:8080 (Press CTRL+C to give up) (uvicorn.error) [app] 10:01:09.007 information HTTP Request: POST https://api.cloud.llamaindex.ai/api/v1/beta/agent-data/:search?project_id= |
The “Uvicorn” messages point out that our agent has been deployed and is operating as a microservice API inside the LlamaCloud infrastructure. If you’re conversant in FastAPI endpoints, you might need to strive it programmatically by way of the API, however on this tutorial, we are going to hold issues easier (we promised zero coding, didn’t we?) and check out every part ourselves in LlamaCloud’s personal consumer interface.
To do that, click on the “Go to” button that seems on the high:
Deployed agent up and operating
Now comes essentially the most thrilling half. It’s best to have been taken to a playground web page known as “Evaluation,” the place you possibly can strive your agent out. Begin by importing a file, for instance, a PDF doc containing an bill or a contract. For those who don’t have one, simply create a fictitious instance doc of your individual utilizing Microsoft Phrase, Google Docs, or the same instrument, akin to this one:
LlamaCloud Agent Testing UI: processing an bill
As quickly because the doc is loaded, the agent begins working by itself, and in a matter of seconds, it would classify your doc and extract the required information fields, relying on the doc sort. You may see this outcome on the right-hand-side panel within the picture above: the full quantity and bill date have been appropriately extracted by the agent.
How about importing an instance doc containing a contract now?
LlamaCloud Agent Testing UI: processing a contract
As anticipated, the doc is now labeled as a contract, and on this event, the extracted data consists of the names of the signing events.
Properly completed! As you retain operating examples, be sure to approve or reject them based mostly on whether or not they have been processed appropriately: this helps the agent be taught from suggestions.
Agent testing circumstances and their standing
Wrapping Up
We’ve got seen tips on how to construct and deploy, step-by-step and with no strains of code, an AI agent able to classifying paperwork and processing them in several methods relying on the doc sort — all in a matter of minutes and inside LlamaCloud’s newly added characteristic, LlamaAgents Builder.


